
Your First Steps with Chrome Enterprise Core
Deploy, secure, and manage Chrome browser across your entire organization.
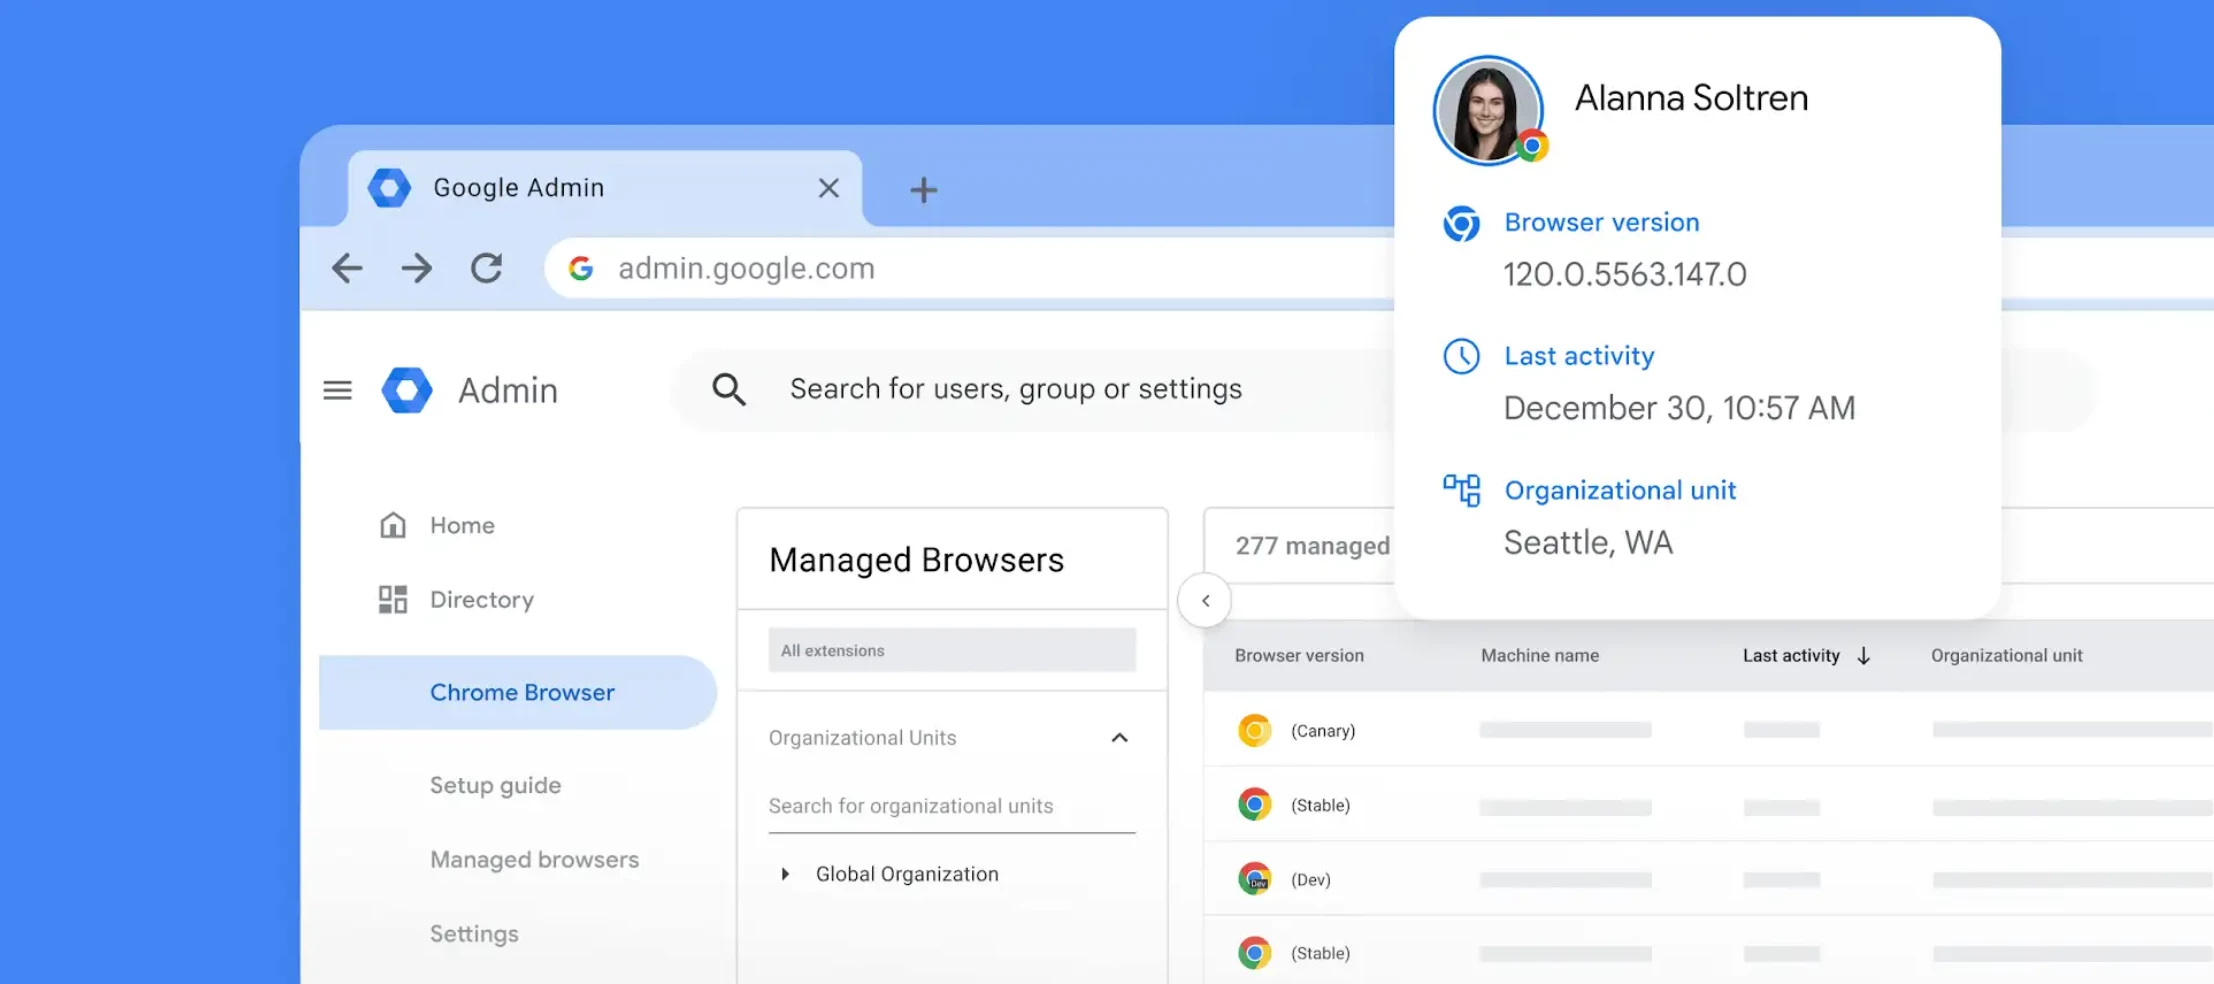
Chrome Enterprise Core allows you to manage browsers on Windows, Mac, and Linux from a central console, the Google Admin Console.
We know that getting started with a new platform can sometimes feel overwhelming, so we’ve designed an onboarding experience to help you get started and begin seeing how helpful this solution is as quickly and easily as possible.
Here is everything you need to know to take your first steps into Chrome Enterprise!
Getting Started
If you haven’t yet, Sign up for Chrome Enterprise Core! It’s free and it only takes a few clicks.
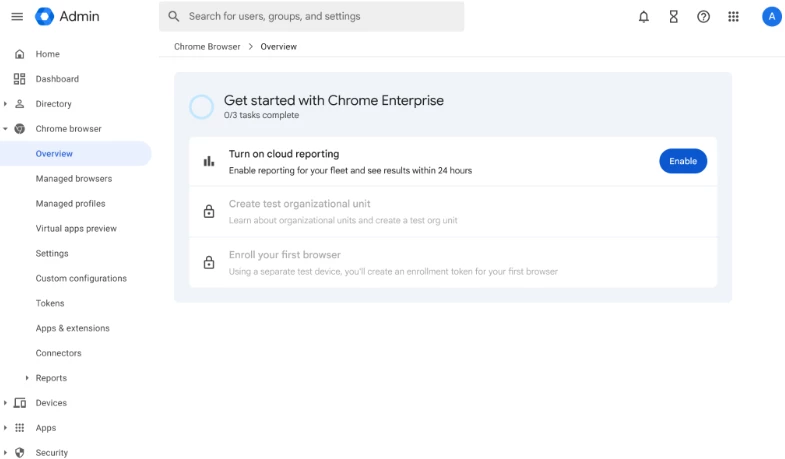
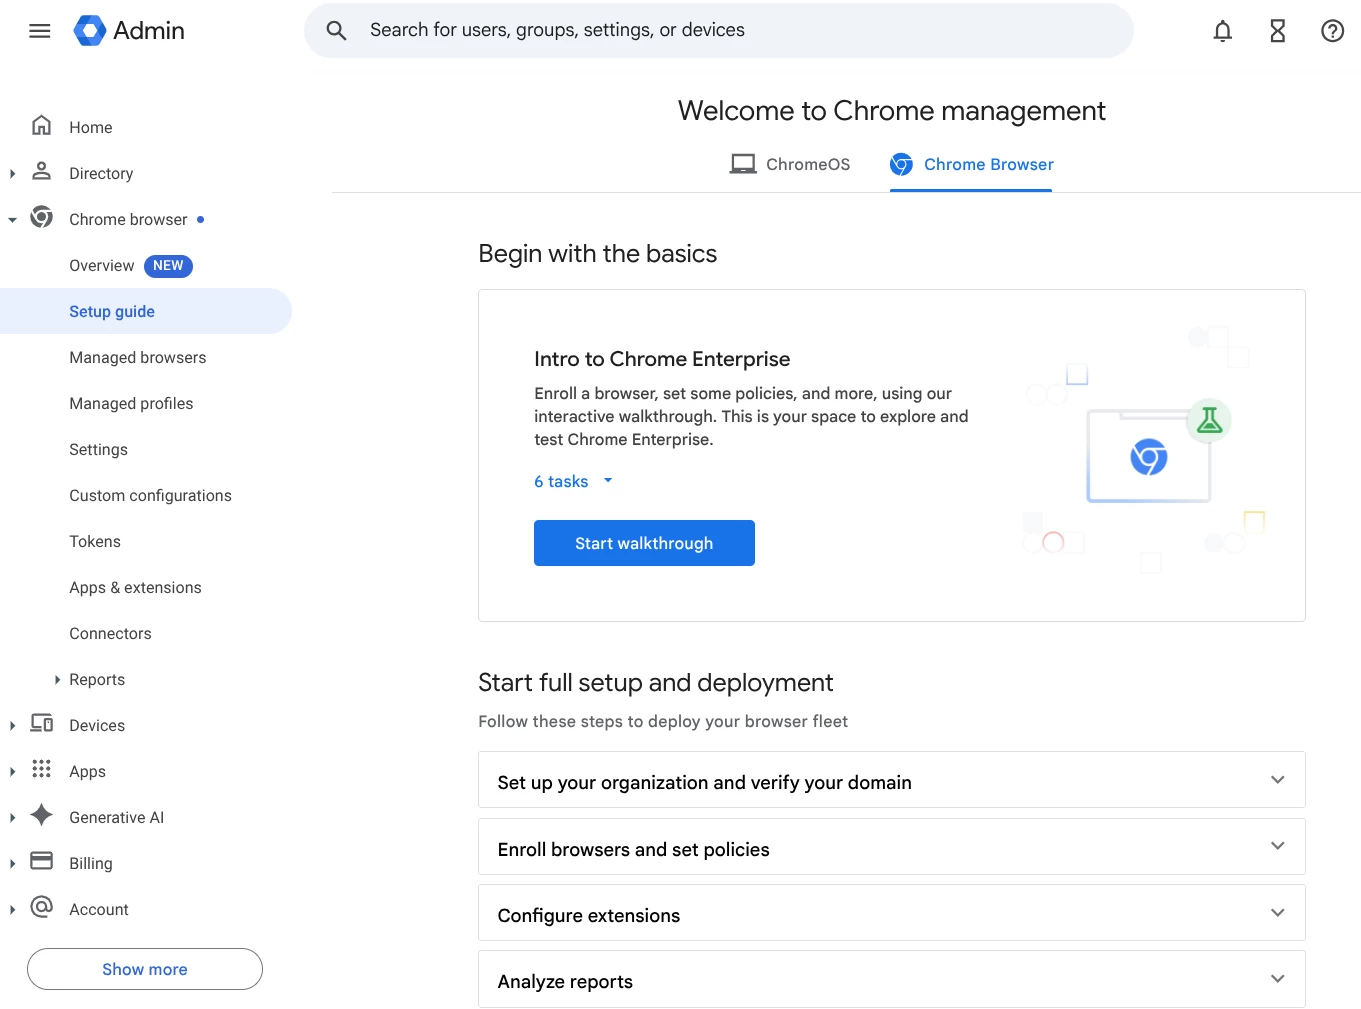
When you land on your Admin Console Overview Page for the first time, you will be greeted by a streamlined, linear 3-step setup guide.
You can follow the guided onboard or simply follow the 3 steps below.
Step 1: Enable Cloud Reporting
The very first step is to turn on Cloud Reporting. We encourage you to enable this right away so you can start seeing valuable data populate in your overview reports.
With a simple click of the Enable button, you will activate reporting at your Root Organizational Unit (OU) level. This includes:
- Browser and Profile Reporting
- Apps & Extensions Reporting
- Crash Reporting
Note: Once enabled, you can always adjust these settings later by navigating to your Settings page in the Admin Console.
Step 2: Create a Test Organizational Unit (OU)
Once reporting is on, your next task is to create your first Organizational Unit.
We’ll prompt you to create a new Test Org Unit. By default, we suggest naming this unit "Browser Management," but you are completely free to customize the name to fit your organization's naming conventions.
Setting up this test OU gives you a safe space to experiment and enroll your initial devices before rolling out policies company-wide.
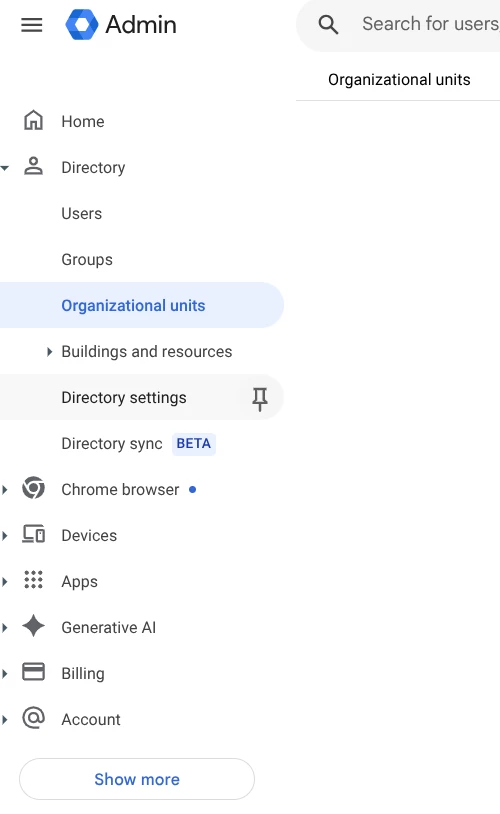
After your test OU is successfully created, you can easily navigate to the Organizational Units page to create more if needed.
Step 3: Enroll Your First Browser
The final step in your initial setup is enrolling your very first browser!
You can follow the step-by-step from the overview page or go to Menu
Devices > Chrome > Managed browsers.
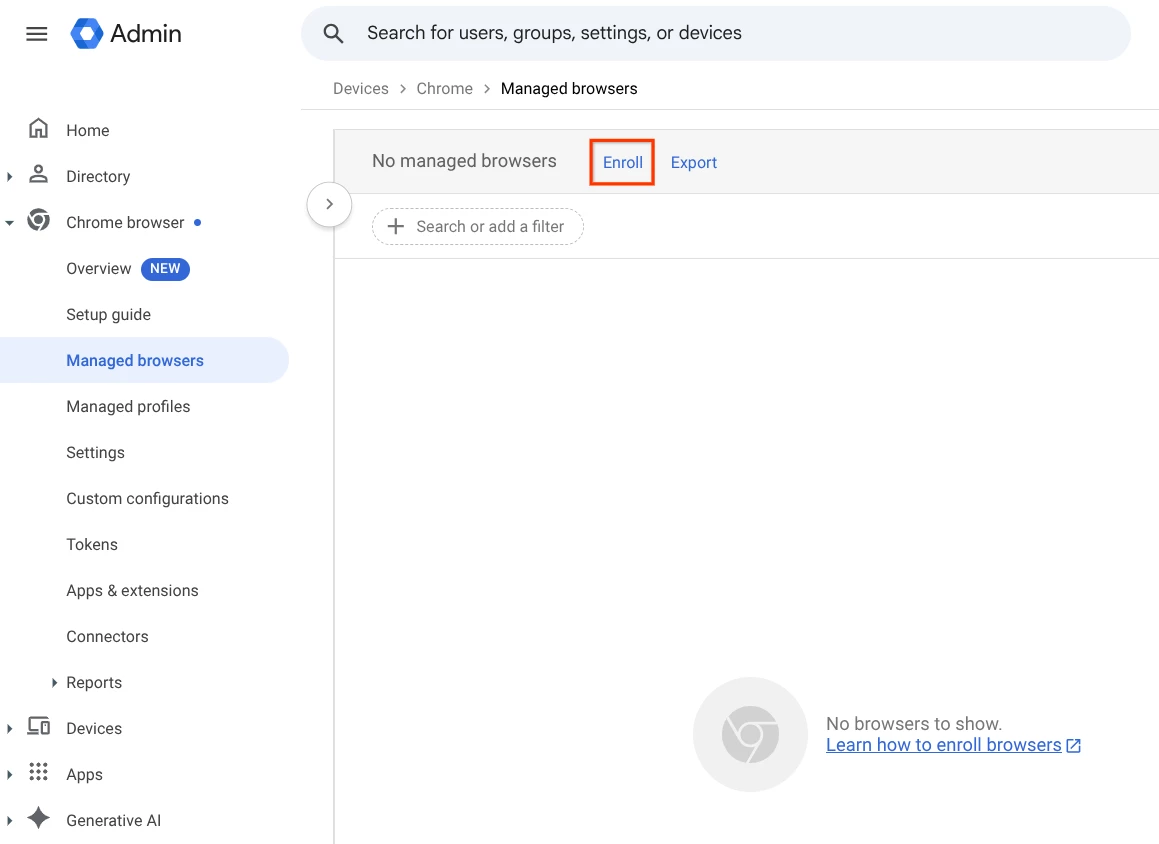
We've made this as flexible as possible to accommodate your device preferences:
- Windows: We will provide a downloadable .reg file for you to run on your test device.
- macOS or Linux: You can opt to download a .txt file with the necessary configuration.
- Android: Instructions can be found here.
- Via Enrollment Token: If you prefer, you can easily choose to copy the enrollment token manually.
Once you’ve downloaded the file and run it on a separate test device, simply click "I've completed the steps." Our system will automatically check to confirm that your browser was successfully enrolled, no manual verification needed on your end!
(Encountered a hiccup? Don't worry. If the enrollment fails, we will let you know and give you the option to try again.)
Step 4: Setup Guide
You’re now ready to start managing your browsers! You can check out the Setup Guide next for a walkthrough on how to set policies and configure extensions.
Related Resources