

Configure Chrome Enterprise Premium DLP Templates
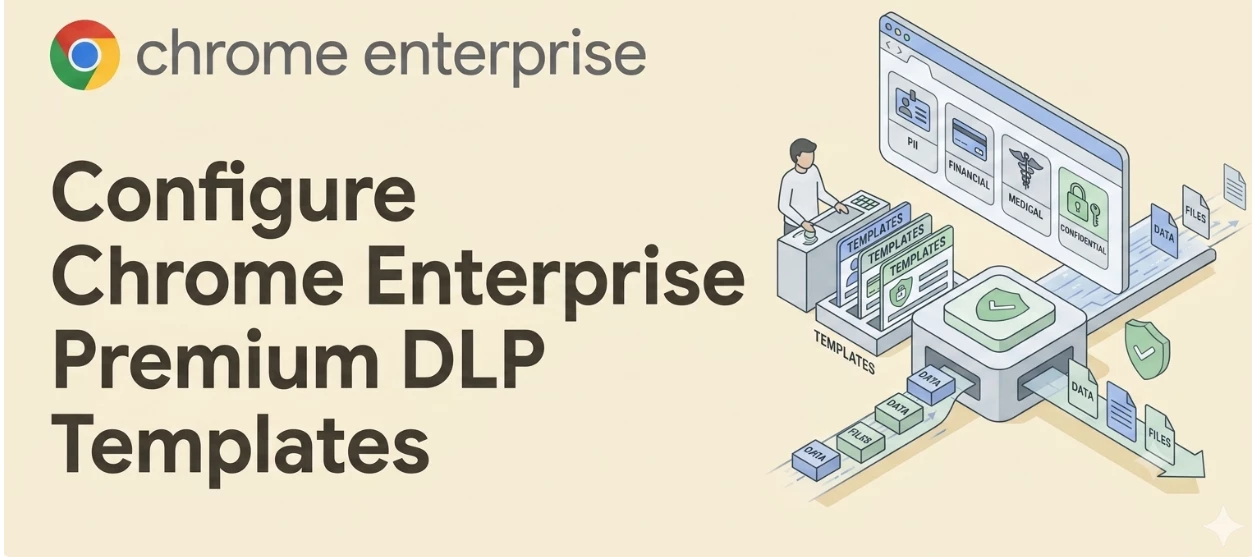
Data Loss Prevention (DLP) rules within Chrome Enterprise Premium allow administrators to monitor and control user actions across Chrome browser on Windows, Mac, Linux and ChromeOS devices. By leveraging DLP, you can automatically scan up to 10 MB of text content in a file to detect sensitive data that is opened, uploaded, downloaded, pasted, or transferred.
While these rules offer extensive control, administrators frequently encounter deployment roadblocks. These challenges include a "cold start" problem where it is unclear which rules to configure first, a lack of predefined recommendations highlighting the most useful use-cases, and uncertainty regarding how to properly mitigate emerging Shadow AI risks.
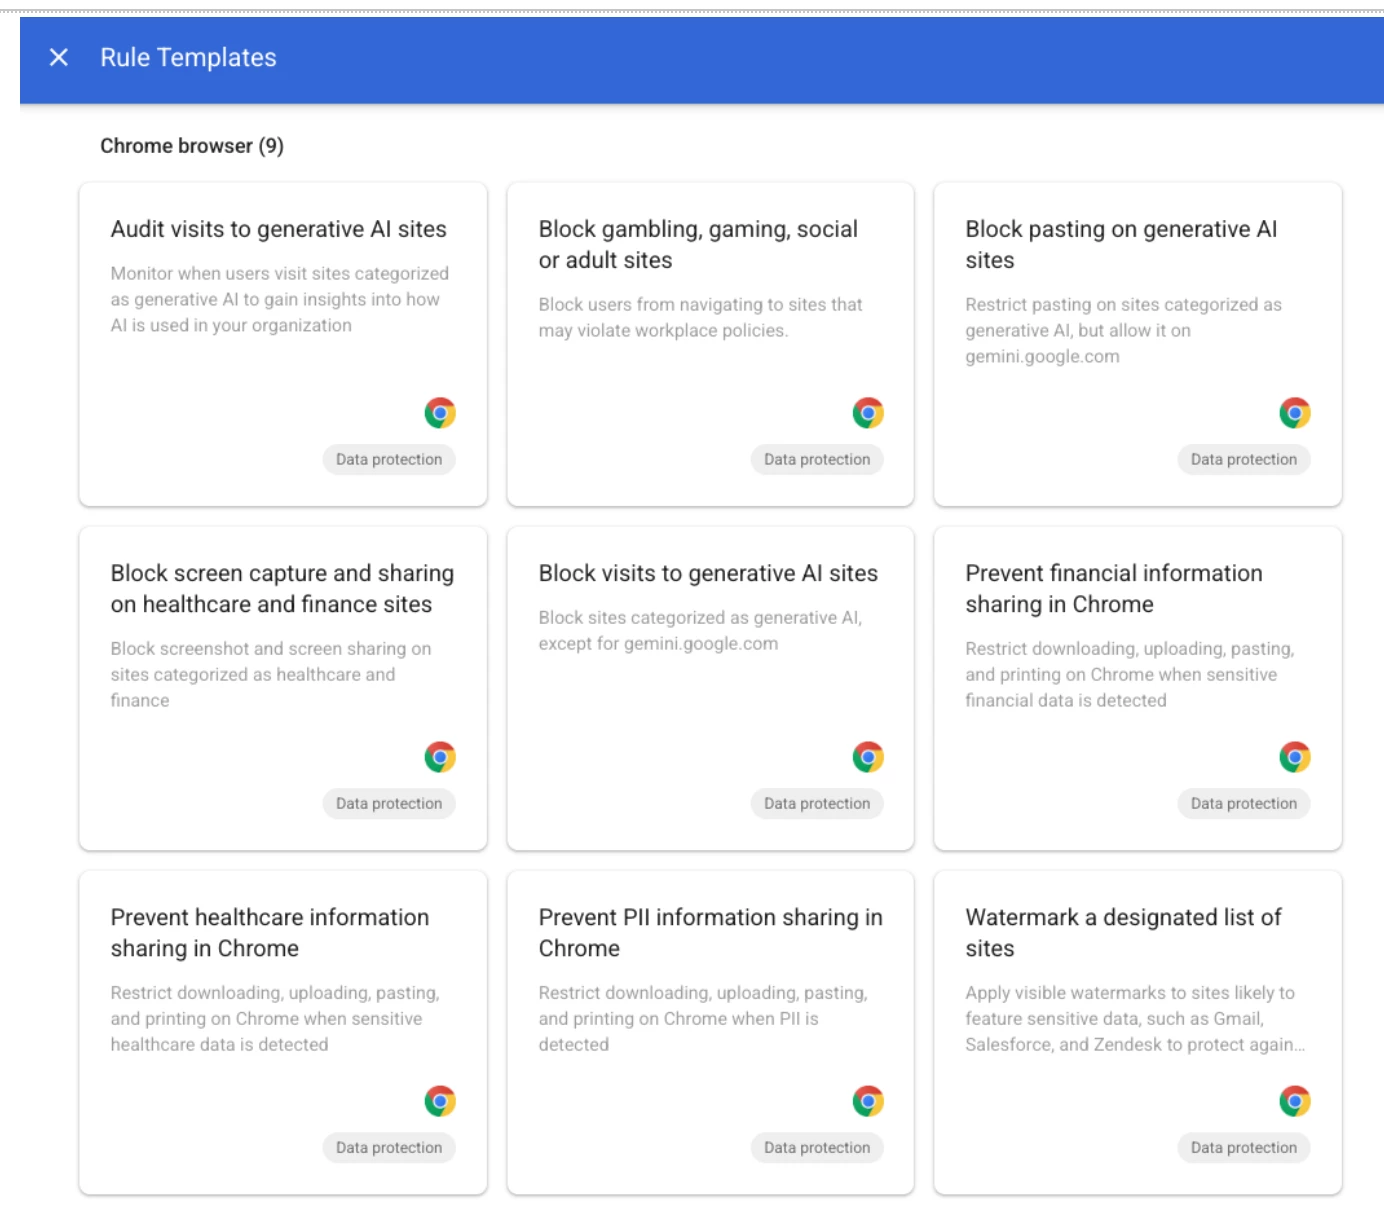
To address these challenges and streamline deployment, Chrome Enterprise Premium now includes 9 new predefined templates covering the most popular DLP rule use-cases. With these pre-baked templates, IT administrators can effortlessly secure their browser environment against common data loss channels.
Primary Launch Use-Cases
The new templates are divided into three core categories to help you deploy impactful policies immediately:
- Managing Shadow AI risks :
- Includes 3 templates:
- Auditing GenAI site visits
- Restricting pasting on GenAI Sites
- Fully blocking access to unsanctioned generative AI websites, with an exception for Gemini
- Includes 3 templates:
- Protecting sensitive data upload/downloads/paste:
- Includes 3 templates to prevent accidental or malicious leakage of most common & critical sensitive information such as:
- PII information (e.g. social security numbers, passport numbers, etc…)
- Financial Information (e.g. credit cards, bank account information, etc..)
- Healthcare (e.g. medical account numbers, etc...)
- Controlling corporate data:
- Includes 3 templates to deploy preventative measures like watermarking sensitive text and restricting external uploads.
Prerequisites and Connectors
Before configuring DLP rules or utilizing templates, ensure your environment meets the following requirements:
- You must have the Chrome Enterprise Premium licence.
- You must set up your Chrome Enterprise connector policies. Content gathered in Chrome must be uploaded to Google Cloud for analysis. For the File uploaded and Content pasted triggers, the blocking behavior depends directly on your connector policies' "Delay file upload" and "Delay text entry" settings.
Understanding User Events and Actions
Before defining what content your rule should look for, you specify the trigger that initiates the scanning process. Chrome Enterprise Premium supports the following user events:
- File uploaded: A user uploads a file from their device in Chrome browser.
- File downloaded: A user downloads a file to their device.
- Content pasted: A user pastes content into a webpage.
- Content printed: A user prints the content of a webpage.
- URL visited: A user navigates to a URL.
When sensitive content is found, your rule enforces an action:
- Block: Stops the user from completing the action. You can display a custom message up to 300 characters (supporting hyperlinks) to explain why the action was blocked.
- Allow with warning: Lets the user proceed after a warning message. The user's choice to proceed is recorded in the log events.
- Audit only: Allows the user to proceed without interruption and logs the event for review.
Deploying a Predefined DLP Template
Using predefined templates accelerates the creation of data protection rules by automatically supplying the necessary data types (e.g., Global - Credit Card Number, Global - Bank account number (IBAN)).
To use a template:
- Sign in with an administrator account to the Google Admin console.
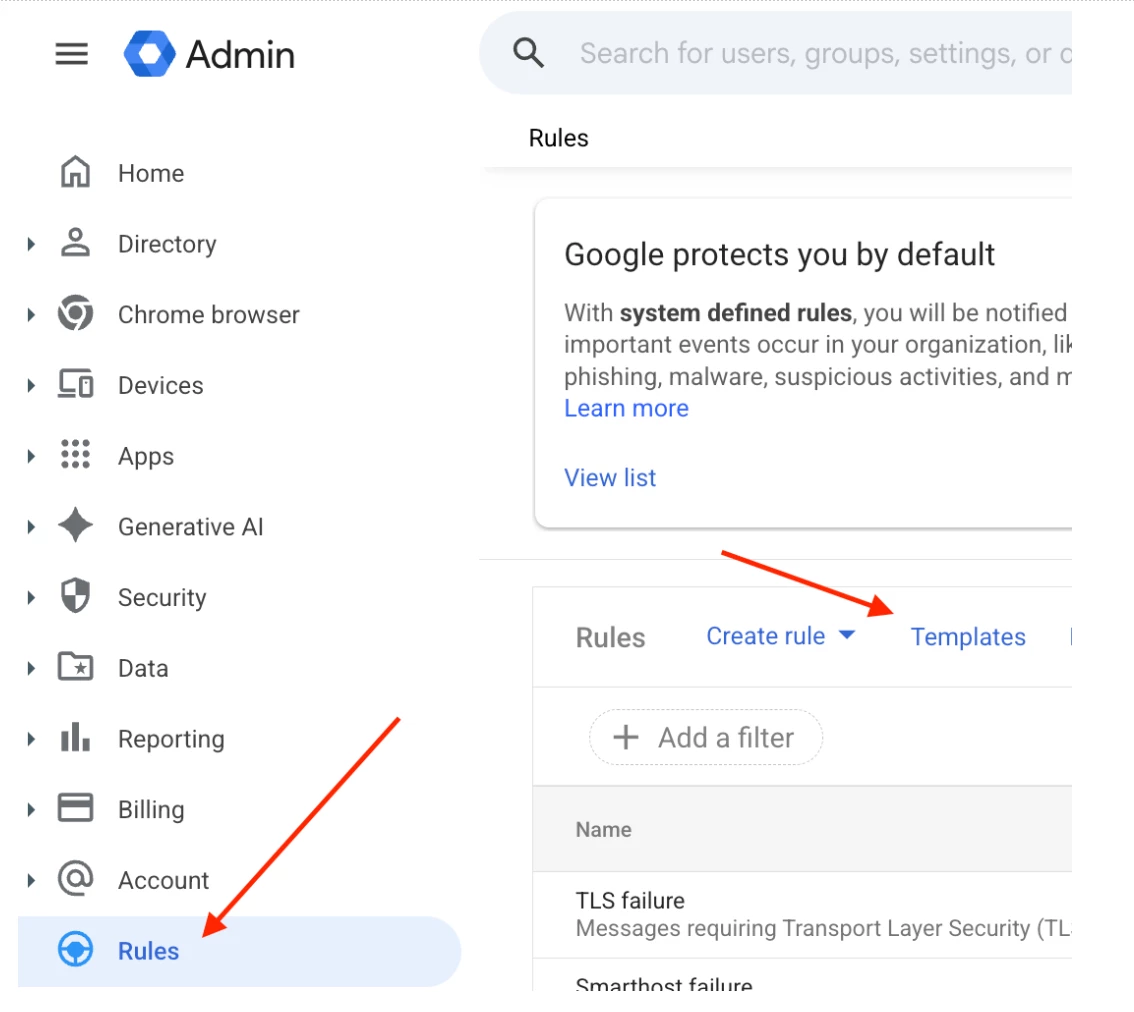
- Go to Menu > Rules > Templates. (Note: This requires having the View and Manage DLP rule privileges.)
- Go to Chrome browser.
- Click one of the predefined templates in the list.
- To configure the template for your environment, you must:
- Select a user event (e.g., File downloaded).
- Map condition values to the corresponding options.
- Select an action (e.g., Block or Audit only).
Enabling Optical Character Recognition (OCR)
To ensure DLP policies apply to text within images, you must enable Optical Character Recognition for Chrome.
To turn on OCR:
- Sign in to the Google Admin console.
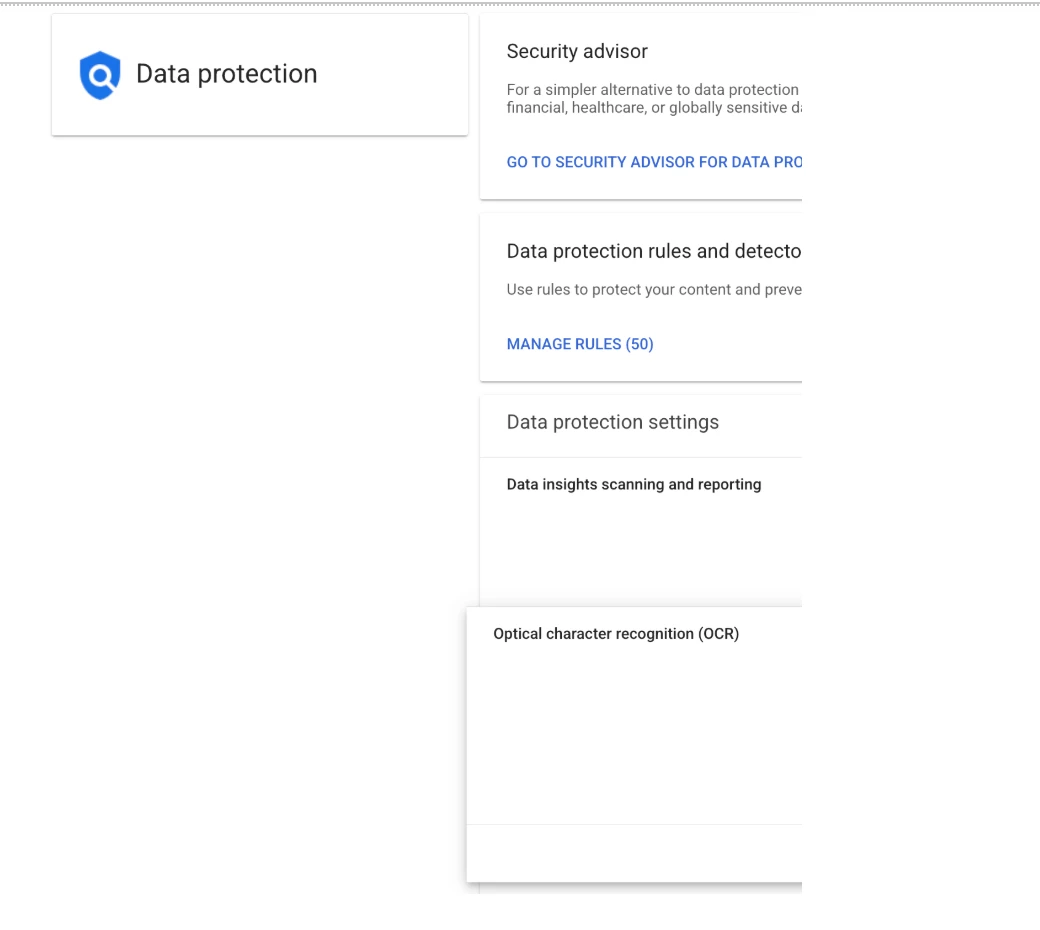
- Go to Menu > Security > Access and data control > Data protection. (Requires View and Manage DLP rule privileges).
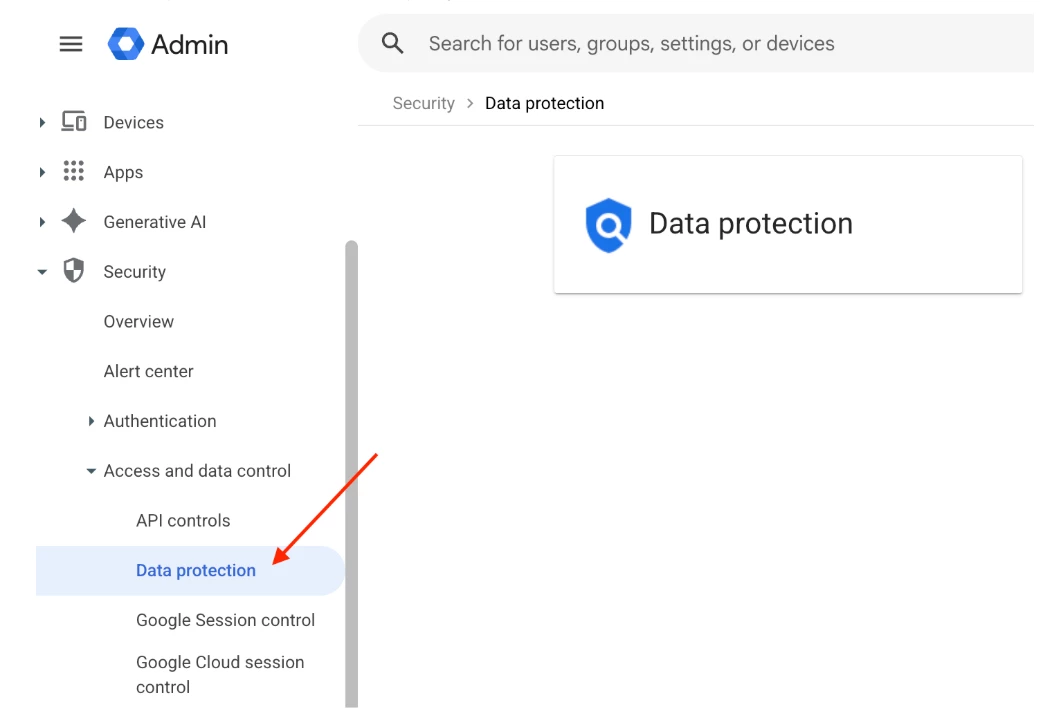
- Go to Data protection settings and click Optical character recognition (OCR).
- Turn on For Google Chrome.
- Click Save.
Review and Investigation
Once your templates are active, Chrome Enterprise Premium provides detailed telemetry to investigate policy violations:
- Rule log events: View details of incidents and track user attempts to share sensitive data.
- Security investigation tool: Investigate alerts of data-sharing incidents.
- Security dashboard: Review reports including Chrome threat protection summary, Chrome data protection summary, and Chrome high risk users.
Official Resource: Use Chrome Enterprise Premium to integrate DLP with Chrome - Google Help
