Food: Pizza guide
A few months ago, we were asked about our favorite food, pizza was the winner! But a few months later, @Alex_Muc decided to create the Sushi guide as nobody mentioned.
The topic initiated an active discussion, one of the comments was from @Emilie_B , asking for my home made sushi. I don't really make my own sushi, but I do make home made pizza. And after Emilie found out about that, she has been pushing me to create a guide. So here it is Emilie! It took me 4 months to not forget to take pictures, but I did it
---
Note: I make my pizzas in a real pizza oven, so I don’t know the exact timing for a regular oven.
From what I understand, the main difference is how long you bake it.
It’s always a good idea to get a pizza stone for your oven – it helps you get a crispier and better-baked crust.
This recipe uses flour suitable for a long fermentation, so it’s a “make the dough today, eat tomorrow” kind of deal (sorry!).
🍅Ingredients for the dough
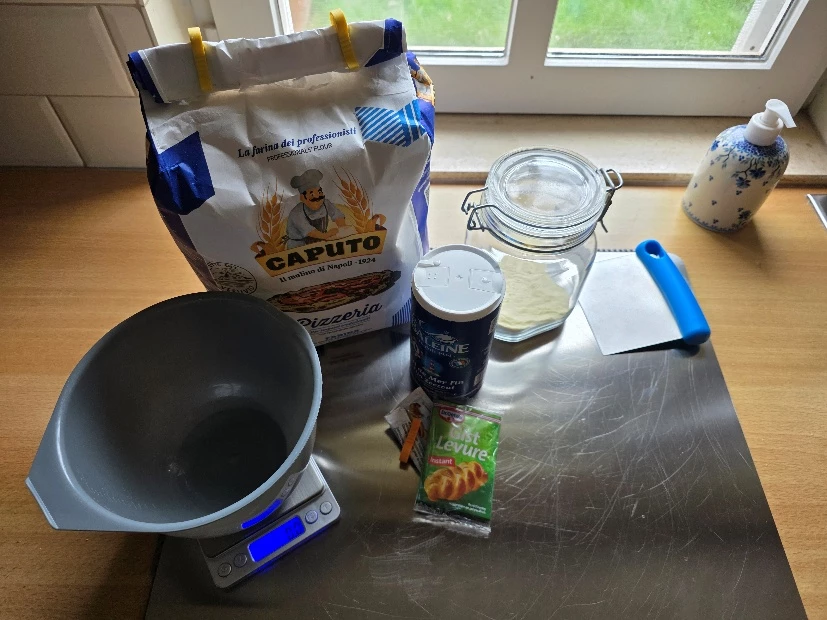
Flour
The type of flour depends on how long you want to let it rise.
The longer the rise, the lighter and more flavorful the crust.
You can do a short 1-hour rise, but personally, I find those pizzas a bit heavy on the stomach.
Check the W value of your flour – this indicates the strength of the flour:
- W 150–200: Weak flour, suitable for cakes, cookies, or quick-rising doughs
- W 200–260: All-purpose, great for bread and pizza
- W 260–300: Strong flour, ideal for Neapolitan pizza or rustic breads
- W 320+: For rising times longer than 48 hours, great for poolish or biga starters
More info: Understanding W Numbers in Flour – Crusters Guide - Crusters
As for brands, I recommend Caputo – it’s available in different W values:
- Doppio Zero – for less than 8 hours rise (W 230)
- Pizzeria – for more than 8 hours rise (W 260)
Other Ingredients
- Salt
- Water at room temperature
- Instant yeast
- KitchenAid with dough hook (or your own hands)
- Flat work surface (countertop, stainless steel, or marble)
- A digital scale accurate to tenths (e.g., 0.5 g / 0.02 oz)
- Semola flour – coarser than regular flour; easy to brush off dough, used for shaping
- Dough box or plastic container for rising
- Should be sealable, or covered with a damp cloth
- Avoid stainless steel or glass, as they take longer to reach room temperature after refrigeration
Ingredients for toppings
Use whatever you like, but here’s what I used for two pizzas:
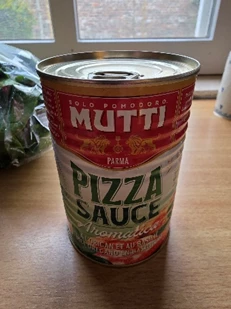
- Pizza sauce
- I recommend Mutti pizza sauce, if available where you live. It has that authentic Italian pizza flavor. Fantastic.
- Parmesan cheese (Parmigiano Reggiano, stronger in flavor)
- Grated mild cheese (my wife insists on “normal” cheese on pizza 😄)
- Canned tuna
- Cow’s milk mozzarella
- Onion
- Arugula (rocket)
- Smoked chicken
- Mozzarela (pull it apart and place it on piece of kitchen paper to let it dry it bit
👨🍳Instructions for Making the Dough
I use the PizzApp+ to get the right ratio of ingredients. See the screenshot for my current preference.
A higher water percentage gives tastier dough, but it’s also trickier to handle. The amount of dough also determines pizza size (if you flatten it nicely):
- Around 250 g (8.8 oz) → about 30 cm (12 in) pizza
- Around 330 g (11.6 oz) → about 40 cm (16 in) pizza
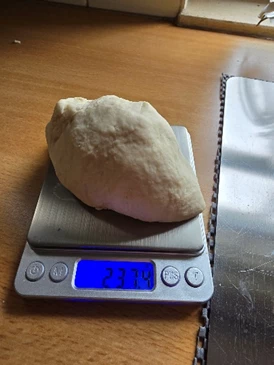
I use 235 g (8.3 oz) – just right for us and gives a bit of wiggle room in the oven

Steps
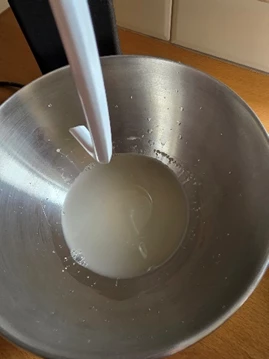
Pour the correct amount of water into a bowl.
Add the yeast and mix until it’s mostly dissolved.
Weigh the flour, add salt, and combine everything in the bowl with the water.
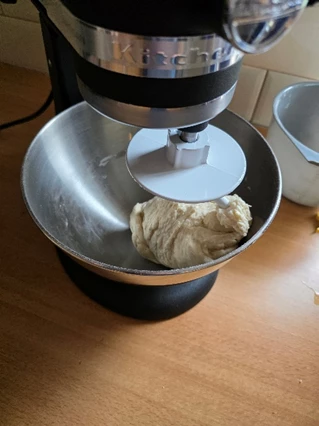
Start kneading, either with a KitchenAid or by hand.
On the KitchenAid, use the dough hook on speed 2 for 8–12 minutes, depending on the flour quantity.
The dough should no longer be too sticky.
When you press it, the dent should slowly spring back; when you stretch it, it should feel elastic – not too much though, or you’ve overkneaded.
Remove the dough from the bowl and place it on your work surface (sprinkle some semola underneath if needed).
Let it rest for 15 minutes under a slightly damp towel so it doesn’t dry out.
Divide the dough into portions of the right weight (e.g., 235 g / 8.3 oz each) and form balls.
Use the stretch and fold technique: stretch the dough, fold it, turn 90°, and repeat (max 4 times).
Form a ball so the dough tightens up.
Check out a video tutorial for a good visual example, like this one: How to stretch and fold pizza dough
Once the balls are ready, place them in your dough box or plastic containers.
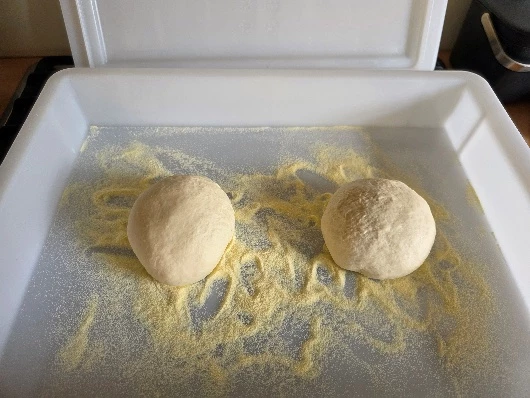
Let them sit for 2 hours at room temperature.
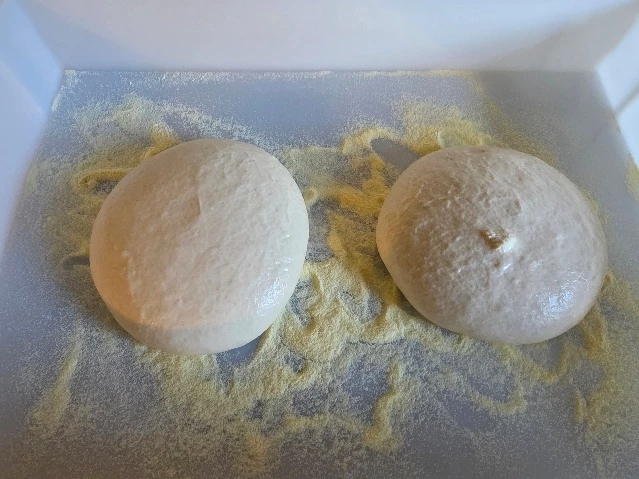
Then move them to the fridge.
This stops the rising process and starts fermentation, which improves flavor and digestion.
If the fermentation is too short, the pizza feels heavy on the stomach.
Take the dough out of the fridge 5–6 hours before baking, letting it slowly come back to room temperature.
The dough should know have almost doubled in size and is now ready to be turned into pizza!
Instructions for Making Your Pizza
Turn on your oven. I use an Ooni Koda 12 pizza oven, set it to full blast to heat it up properly.
Shaping Your Pizza
Here’s where many people go wrong: don’t use a rolling pin!
It presses all the air out of the dough. You’ll end up with a flat pancake – might as well make a sandwich instead 😁
Take a dough ball from the box and place it on your work surface with enough semola underneath.
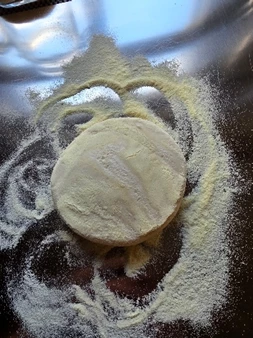
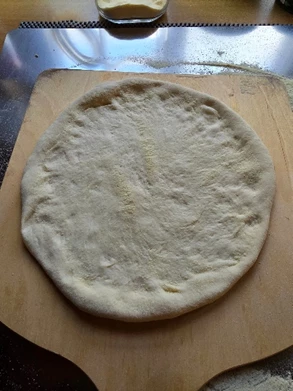
Use your fingers to press the center down and make a small dent, gradually widening it without touching the edges. Work from the center outward.
Once it’s wide enough, use the palms of your hands – but make sure the center doesn’t get too thin.
Again, watch a video tutorial for technique examples, like this one: The easy way to stretching a pizza - YouTube
Once you’ve shaped a nice round (or somewhat round😅) pizza, place it on your pizza peel. Brush off excess semola gently.
🍕Topping Your Pizza
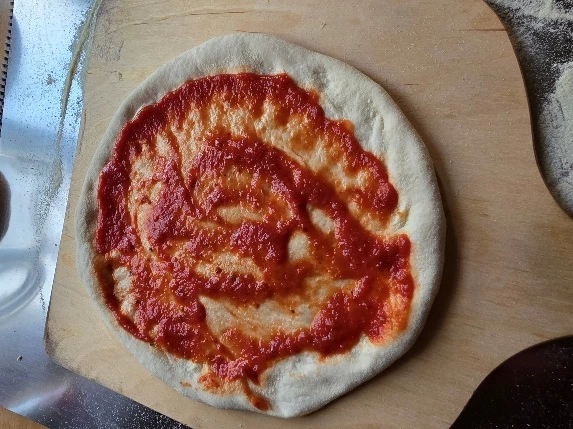
Start with the pizza sauce – spread it with a spoon, but avoid touching the edges. That’s how you get those nice puffed crusts. 2–3 tablespoons of sauce is plenty.
More might seem tasty, but makes the pizza too wet and heavy (trust me, I’ve been there ).
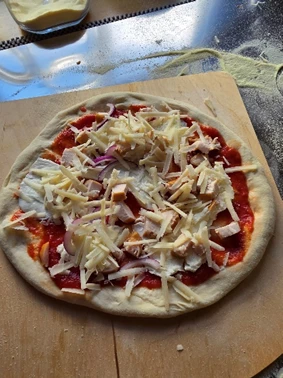
Add your toppings!
Finish with cheese so it melts nicely and protects the ingredients underneath from burning.
Our pizzas this time:
Pizza 1
Tomato sauce
Tuna
Onion
Grated mild cheese
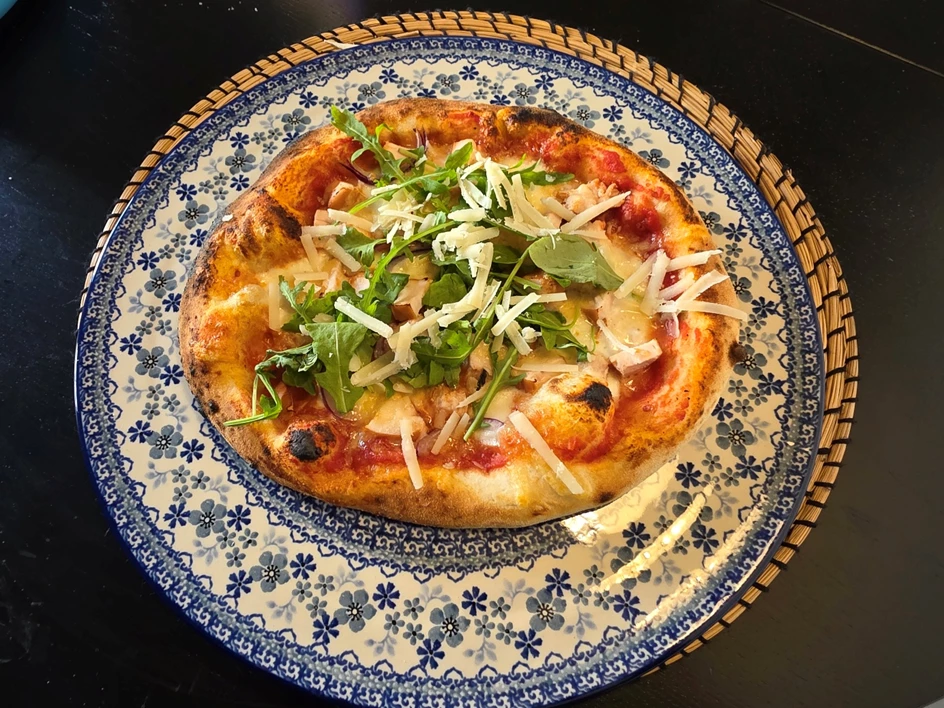
Pizza 2
Tomato sauce
Smoked chicken
Mozzarella
Parmesan (Parmigiano Reggiano)
🔥Baking
The stone in your pizza oven should be around 350–400 °C (660–750 °F).
Slide your pizza smoothly into the oven. Turn the knob at the back of the oven down to about halfway – this prevents the top from cooking faster than the bottom.
Wait 30 seconds, then rotate the pizza a quarter turn. Repeat until it’s gone full circle.
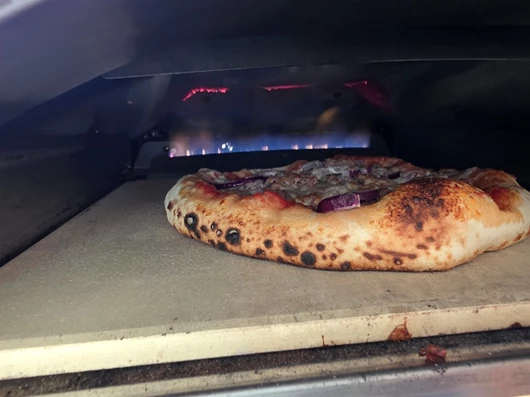
Your pizza is now ready! Time to eat! 🍴
Or, if you’d like to keep peace at home, put your partner’s pizza in next and repeat the steps. 😆Between pizzas, crank the gas back up to keep the stone hot.
Finishing Touches
Sprinkle a bit of oregano on top.
Add some arugula for a fresh finish and enjoy your pizza!